
User interface
After logging in using the HWR username and the corresponding password, a clear interface with three central areas becomes available.
The chat window with the dialogue area
The largest area in the center is where the actual conversation with the AI model takes place.
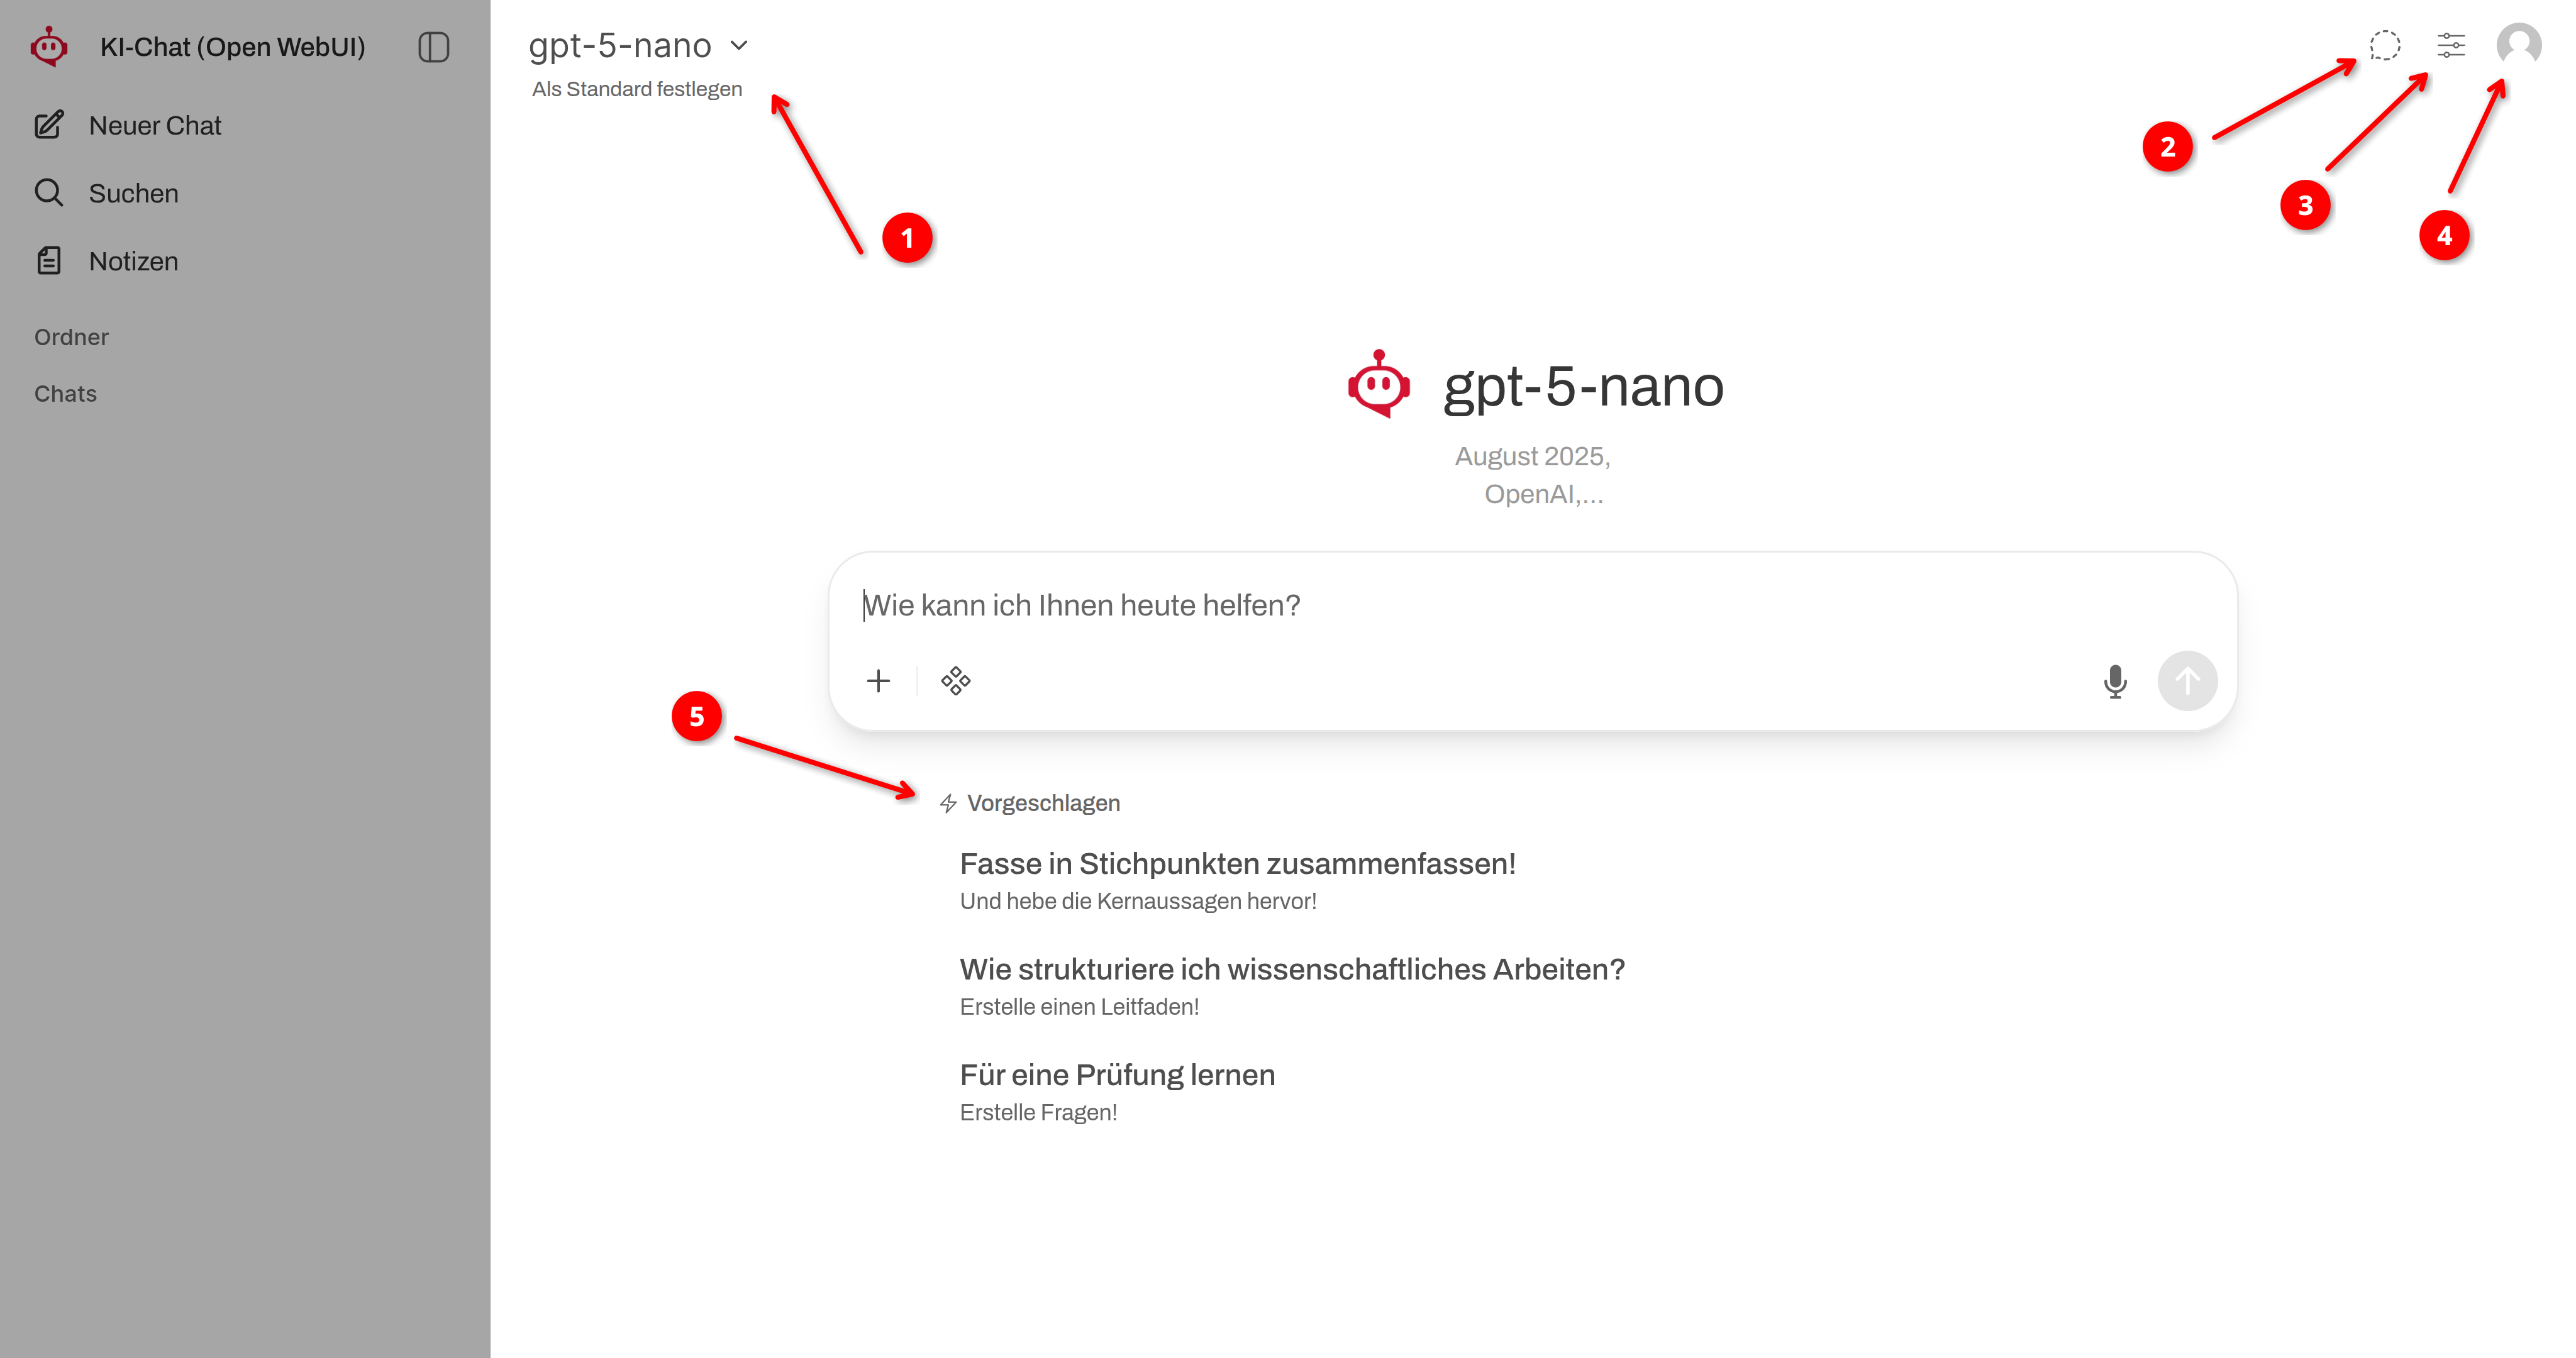
➊
Model Selection
- The GPT-5-nano model is selected by default.
- You can switch the language model via the model selection..
➋
Temporary chat
- If you activate “Temporary Chat,” you can ask a quick question without the history being saved.
- The chat history is deleted when the window is closed or you switch chats.
➌
Controlls
- You can assign a system prompt to the current chat via the controls.
- With the system prompt, you give the language model an instruction that is followed throughout the entire chat history.
- e.g., “Create a step-by-step guide. Start with the first step and only proceed after receiving appropriate feedback from me!”
➍
Settings
- You can access settings, archived chats, and keyboard shortcuts via the user icon.
- In the settings, you can select the color mode (light/dark) and the language for the AI chat.
- You can view the available keyboard shortcuts for keyboard navigation.
Sidebar

You can open the navigation bar using the AI chat icon on the left edge. Here, you can organize all your chats.
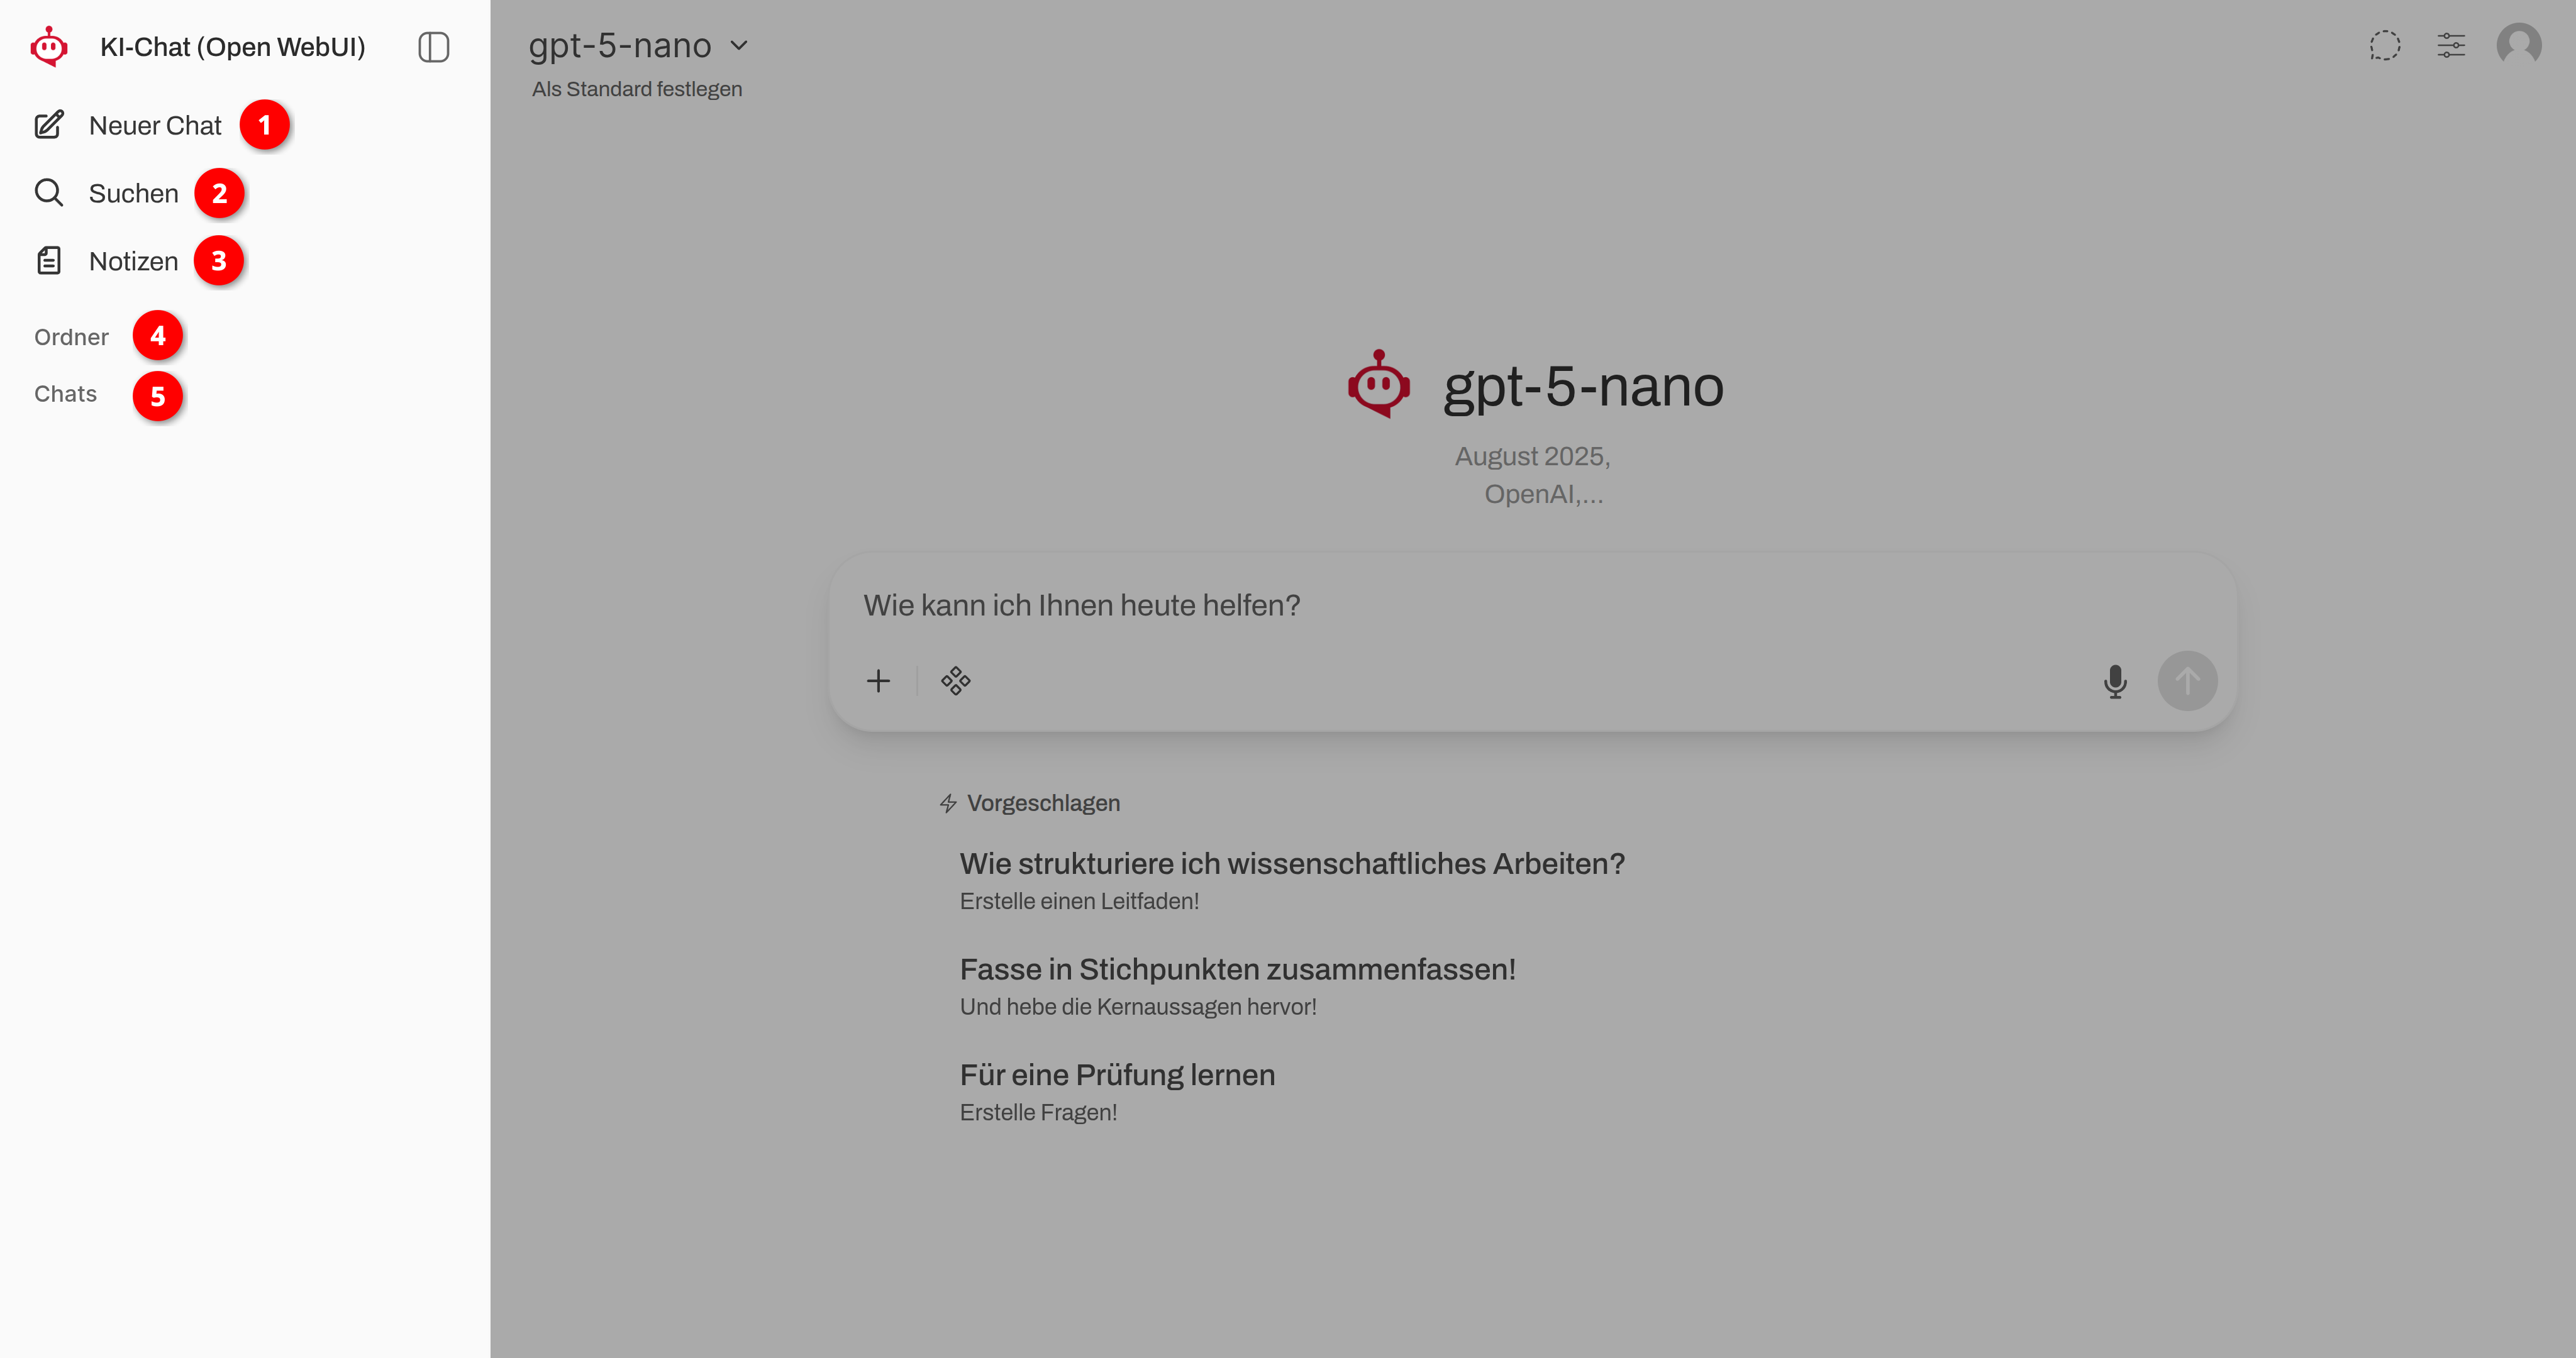
➊
New Chat
- Start a new chat at any time.
- You can open a new chat in a new browser tab by clicking the middle mouse button or by right-clicking and using the menu.
➋
Search
- You can use the search function to search through all your chats and folders.
- This is particularly helpful when a large number of chat histories have accumulated over time.
- Notes are not included in the search.
➌
Notes
- Create and manage notes.
- Notes can be used as a reference in the AI chat at any time. This is particularly useful when the same information base is required for recurring tasks.
➍
Folders
- Create folders and organize your chats.
- You can assign a specific system prompt to each folder. This allows you to easily access and execute recurring tasks.
➎
Chats
- Any chat that is not conducted as a “Temporary Chat” or started directly within a folder is initially saved here.
- The chats are automatically assigned a title.
- Hover your mouse over a chat title in the left sidebar and click the three dots to open the corresponding menu.
- Select the pencil icon from the menu to rename the chat.
- Select the trash can icon from the menu to delete a chat.
- Click on a chat title and drag it into any folder while holding down the mouse button.
The input field
This is where the messages/prompts for the AI are entered.

The plus icon gives you access to the menu where you can add more information to the prompt.
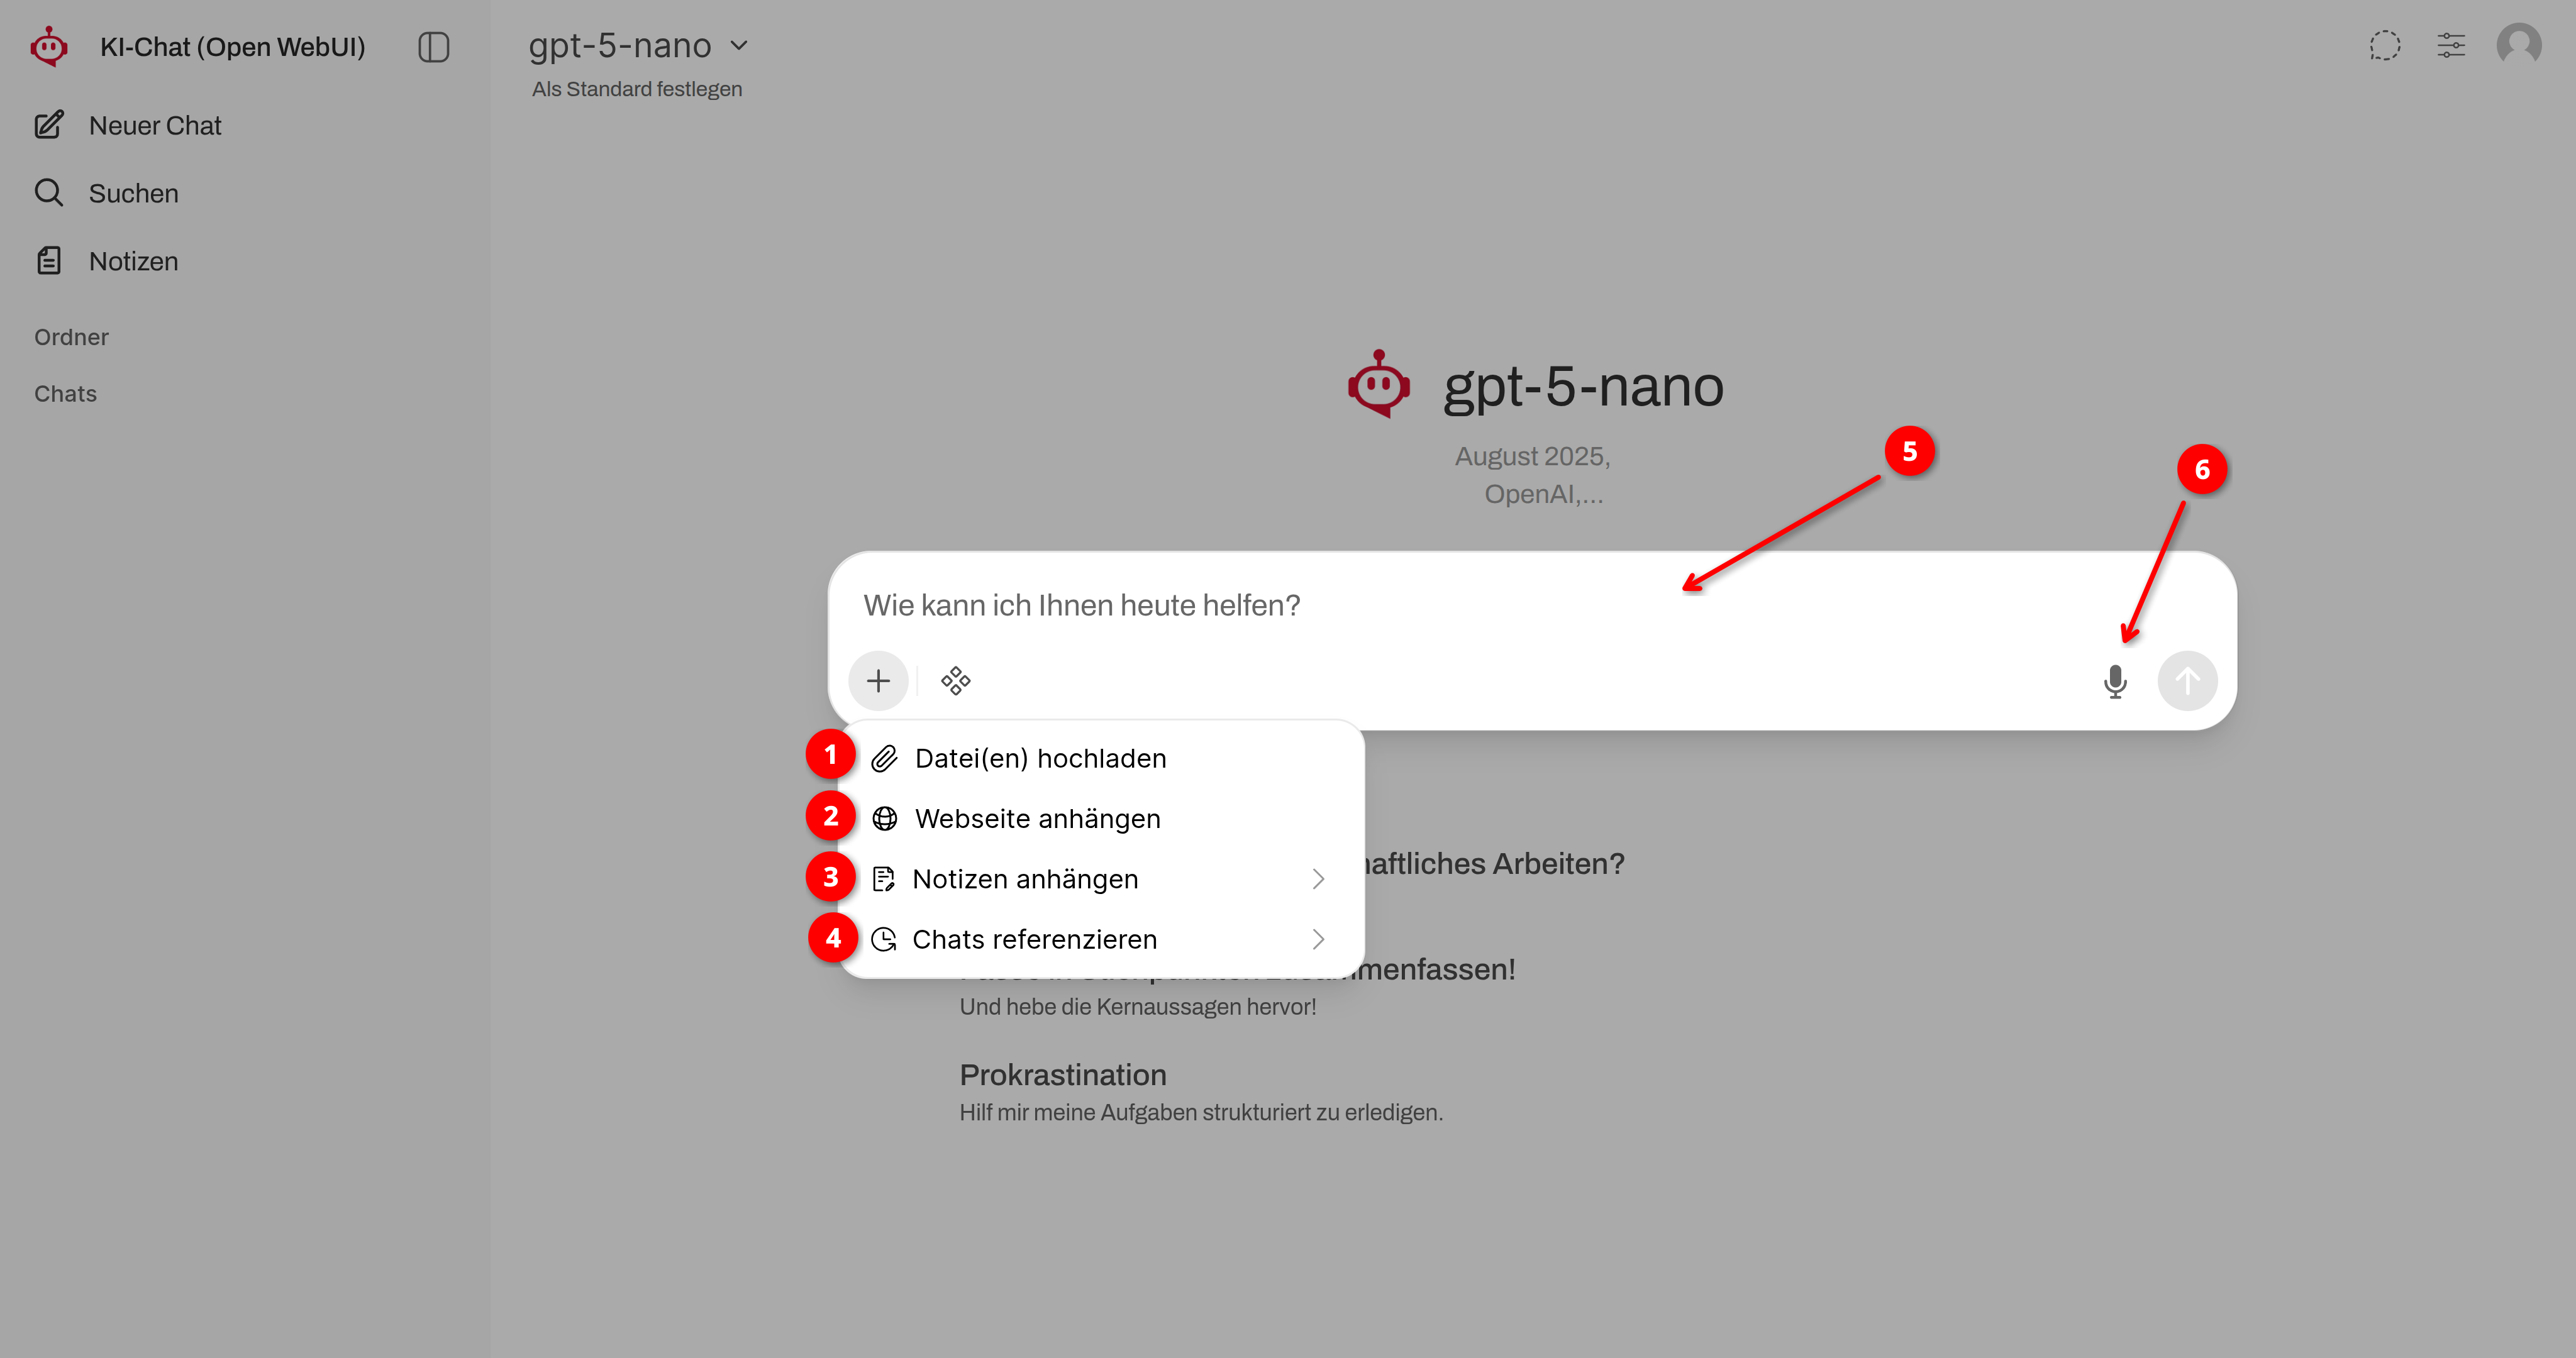
➊
Upload file(s)
- Allows you to upload files that serve as an information base for the AI to use in processing your instructions.
- Supported file formats: PDF, TXT, DOCX, MP3.
➋
Attach website
- Add the address (URL) of a webpage to your input.
- Since an automatic web search is not possible, you can directly add websites you have researched in advance and have them processed.
➌
Attach notes
- Use your notes as a repository of information for working on your tasks, and add them directly to the input.
➍
Reference chats
- Have you already developed basic information in past, saved chats? Use all that content in the AI chat as a knowledge base for your next task.
➎
Text input
- Formulate your prompt directly or copy it from any prompt library.
- Processes Markdown format.
➏
Dictation function
- Use a headset or your camera’s microphone to speak your instructions directly.
- This requires granting microphone access permission in your browser settings.